Tuesday, April 17, 2012

Homemade Pizza

I have had a hankering for homemade pizza the past few weeks. So a couple of weeks ago I brought home some pepperonis from the store to make one, but the pepperonis were MIA. My husband, who loves snacking, had eaten the entire bag, even after I told him not to because they were for the pizza. So I went to the store, AGAIN, and got more, then threatened him with no homemade food if he ate them. That always seems to work. The crust recipe makes two pizzas, so naturally I had to make different kinds.


The crust recipe I used is from the Pioneer Woman cook book, recipe is here: http://tastykitchen.com/recipes/main-courses/basic-pizza-crust/ and for this pizza I followed the directions exactly.

Pizza Sauce: In a small sauce pan I poured 1 can of tomato puree & one small can of tomato paste, then added about a tablespoon of each garlic powder, dried oregano, dried basil, dried parsley and about a teaspoon of salt and pepper. I cooked it on the lowest temperature my stove will go for several hours with the lid on but vented... while I was gardening.

Pizza assembly: After making the crust and stretching it out I added the amount of sauce I like, one medium block of mozzarella freshly grated (I think this makes a huge difference than using pre-grated cheese that has preservatives), about 1/8 a cup of slivered red onions, 1/4 of a cup of sliced baby portabello mushrooms, olives on Adam's side, and plenty of pepperoni. I baked it at 500 degrees on the bottom shelf for about 7 minutes then moved it to the top shelf to finish it until how I like my pizza cooked. It doesn't take long so don't start any other projects while it's cooking.


I stored the rest of the pizza dough in a mixing bowl with Saran wrap over it. However this time instead of adding more olive oil and stretching it, I put about 1/4 of a cup of white cornmeal on the counter and rolled the dough in it and then rolled it out into a circle with my rolling pin. I rolled it pretty thin and made some crust edges with my fingers. I then transferred it to the pizza pan and cooked it on the very bottom shelf at 500 degrees for about 3 minutes. I like my crust fairly crispy. I liked the crust this way much better!

Alfredo Sauce: In a small sauce pan pour in one small carton of heavy whipping cream, a teaspoon of garlic powder and salt and pepper to taste. Heat it to medium low, not bubbling. Then mix two egg yolks in a small bowl, temper the egg yolks by adding a small spoon full of cream sauce and stirring very fast for about 15 seconds, then add another spoon full and stir very fast for another 15 seconds. Then pour the yolk mixture into the sauce pan and stir for about a minute without stopping (don't stop or it could scramble the eggs rather than thicken the sauce). After that stir every minute or so for a couple of seconds. Heat until you notice the yolks thickening the sauce, then it's done!

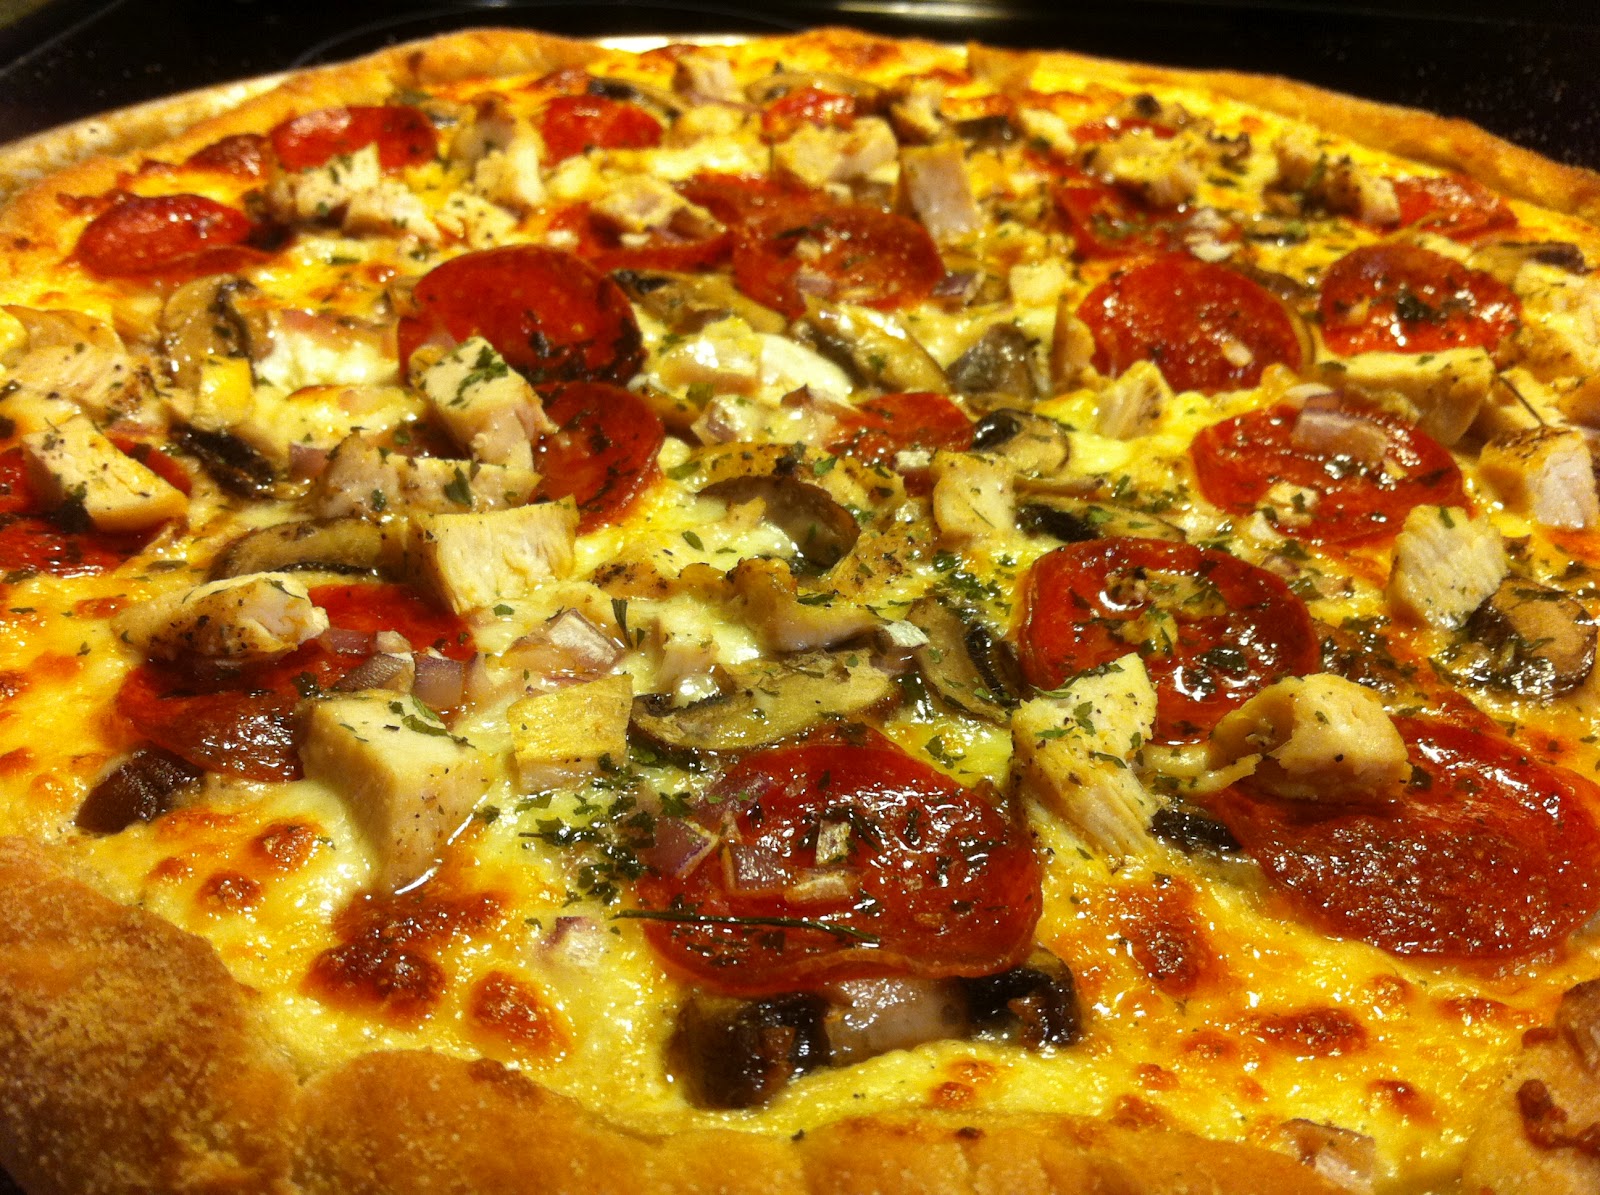
Assembly: After cooking the crust for a few minutes I pulled it out of the oven, added the Alfredo sauce, 1 block of freshly grated mozzarella cheese, red onion slivers, baby portabello slices and pepperoni. I put it back in the oven on the bottom rack for about 5-6 minutes. Pulled the tray out and sprinkled cooked chicken breast over the top with a little dried parsley then put it on the top rack until it was done to my liking.

All the toppings can be changed to your liking. The options are endless!

Enjoy!

Tuesday, April 10, 2012

Busy Bee

It's been nearly two months since I've posted anything, whoops! Between burning, my greenhouse/garden and being out of town I haven't had much free time. Sorry guys!

This has probably been my best year so far with my (our) greenhouse. I've got plants coming out of my ears!

These are some of my tomatoes. This picture was taken about two months ago, they are in the ground right now. But I do have some new tomatoe seedlings in the greenhouse.

 These are my heirloom bell peppers, they are in the ground as well.

I had to move all my plants out of the greenhouse that week we had temperatures in the 90's, it cooked a few of my seedlings before I could move them. These cooler, more normal temperatures are a lot better for my greenhouse! This year I decided to go with a more native approach in my flower bed, because last year during the drought and extreme temperatures, the native plants are the only ones that survived. So, I started purple coneflower, Missouri evening primrose, Russian sage, another primrose (forgot the exact name), foxglove, salvia, liatris, gaura, lavender and ornamental kale for the spring (I realize lavender and kale are not native, but kale is really pretty for the cool season and I'm just going to give lavender a shot!). Now some of those plants aren't exactly native to this area, but they are in the family of native Oklahoma plants. The seeds I started for the garden include, many types of peppers, tomatoes, squash, as well as cucumbers, cauliflower, brocolli, dill, parsley, cilantro, sage and thyme.

Some of my perennials that have started coming back include blanket flower (it's actually blooming), gaura, peony (hopefully they bloom this year, they didn't last year), verbascum, chives, sage, oregano, and asparagus.

Some of you may know what I'm talking about, sorry to the others who I just confused the absolute crap out of. I'll post pictures, promise!


 This is from our biggest burn this year. I've been on nine burns since January!


This picture is from our Kansas burn, which was very productive!

I have also been in the Osage helping people with trapping prairie chickens. I learned some new prairie wildflowers while I was there and got some gorgeous pictures. I'll post once I pull them off my card!

Thursday, February 23, 2012

Potatoes Romanoff

This recipe was posted on the Pioneer Woman's blog Tasty Kitchen. It looks super easy, especially if you have a food processor and a lot of potatoes like I always do, and are looking for yet another way to serve taters. Here's the recipe, complete with lots of pictures. I haven't made it yet :)

http://tastykitchen.com/blog/2011/08/potatoes-romanoff/

Thursday, February 16, 2012

Clearance Valentine's Candy

I was browsing through Food Pyramid today at lunch and after I had already made my purchase and was walking out, I notice two shopping carts full of Valentine's Day candy on clearance. The candy was marked half off, one kind had an extra sticker for $1 off two bags. I never usually eat sweets but my husband however is a candy monster!!!

Original price: $3.58
Sale price: $1.79
Final price (with $1 off 2): $1.29/bag

I got two bags for $2.58, which is $1 less than the original price of one!

I'm sure your local grocery stores are having similar deals like these.

The Good, The Bad & The Ugly: Perfect Cream Sauce

The Good, The Bad & The Ugly: Perfect Cream Sauce

Perfect Cream Sauce

DISCLAIMER: I never said this was healthy.

This cream sauce is similar to the beginning of a homemade alfredo sauce. For those of you who have no idea what I'm talking about, I'll explain.

The base of an alfredo sauce is heavy whipping cream, a teeny tiny bit of butter, egg yolks and fresh grated Italian cheese, like parmesan, and of course salt and pepper.

This cream sauce lacks the cheese and is whipped a little to add fluffiness to it.

Grab a small sauce pan and heat about 2 or so, cups of heavy whipping cream with 2 tablespoons of unsalted REAL butter. Do not subsitute for fat free or anything else, must be HEAVY WHIPPING CREAM. This is not a healthy sauce people, it's a splurge sauce, one of those dishes where you know you're cheating, but it's worth it. Heat the sauce up to medium low for a few minutes until nice and heated through. Separate the yolks from two large eggs. With a fork break up the yolks in a bowl. Ladel a spoonful of warm whipping cream into the bowl with your egg yolks, IMMEDIATELY start to whip with your fork. Do this for about 30 seconds, we are tempering the eggs. If you don't do this you will end up with scrambled eggs in cream sauce. I've done it several times, it's no fun. So this is something you want to make sure and do correctly. Add another warm spoonful of cream to your egg mixture, whip again. Do this with three spoonfuls of cream. Next take your bowl of eggs in one hand and wisk in another, slowly pour the yolks into the sauce pan with cream. Briskly whip the cream with your whisk while pouring in. After about 30 seconds of fast whisking, you can slow it down to a stir with your whisk... but keep the cream moving for about 1 minute. You are in the clear when your sauce all the sudden starts to get thick. Trust me, you'll notice. It's at that point you don't have to worry about scrambled eggs.

Next add a teaspoon of garlic powder (not salt), kosher salt and FRESH cracked black pepper. Before you're ready to serve your sauce you need to fluff it up and make it lighter. I have one of those tools you put in your soup to blend it right in the pot, if you don't have one of those, which most people do not, you can do it by hand with your whisk. Whisk the cream sauce by hand as fast as you can without making a huge mess for about 20-30 seconds. Taste to see if your seasonings are good. The result should be a velvety smooth, rich sauce with a hint of garlic flavor. Serve over your favorite pasta, this sauce is really good over any kind of ravioli.

Wednesday, February 15, 2012

Valentine's Day Dinner

I'm going to apologize in advance, I forgot to take a picture of the dinner Adam and I made together, it would have been a pretty picture.

We made ribeye steaks from Ralph's Packing House, cooked using the technique in the previous post, long green beans with Arkansas bacon from Ralph's and three cheese ravioli 9that I cheated and bought pre-made from the store, hey at least it wasn't frozen) with the most decadent cream sauce you can imagine. I have a couple of tips for the steak technique I posted yesterday...#1 make sure the cast iron skillet is REALLY hot, you want those steaks to have a slight crisp to them on each side before putting them in the oven #2 that recipe is for a fillet, or a thick steak, I lowered the time in the oven and still could have lowered it a little more. Our ribeyes were about an inch thick, so for your average steak I would cook them in the oven at 400 degrees for 3 minutes rather than 5-7 for a medium rare steak. Don't get me wrong the steak was amazing, I'm just a perfectionist when it comes to cooking...if I'm going to eat the calories, it better dang well be worth it! #3 Don't grab and pick up off the counter, a full-size cast iron skillet that just came out of a 400 degree oven with your bare hand, it hurts... really bad. Thankfully I have a sweet husband who helped do things I couldn't do with just one hand.

The cream sauce... oh the cream sauce, I am more excited that I figured out the cream sauce than anything else about the dinner... even thought it all was very delicious! We ate at a new restaurant in town called Brooklyn's a few weeks ago and I had chicken and cheese filled ravioli with cream sauce. The sauce in that dish was so velvety and smooth and rich words can't even explain! I tried replicating it a couple of weeks ago and it was good, but just not exactly what I was looking for. However, last nights was perfect! In fact, it was so good I could have tipped the sauce pan back and drank all of it... and licked it clean. I'm going to do a separate blog post on the cream sauce so it's easy to find in a search.

To sum it up, our Valentine's dinner was amazing, the entire dish! However I had a bag of ice in my right hand and could put it down with just enough time to cut a bite of steak before it hurt so bad I couldn't bear it anymore, then had to quickly grab it to ease the pain. I even had to sleep with it in my hand, not very fun, but apparently it did a lot of good. It's feeling better than I ever expected it too this morning!